Disclaimer! AFAIK You may install 16GB of RAM for QuadCore system only! If you have DualCore processor it’s limited to 8GB.
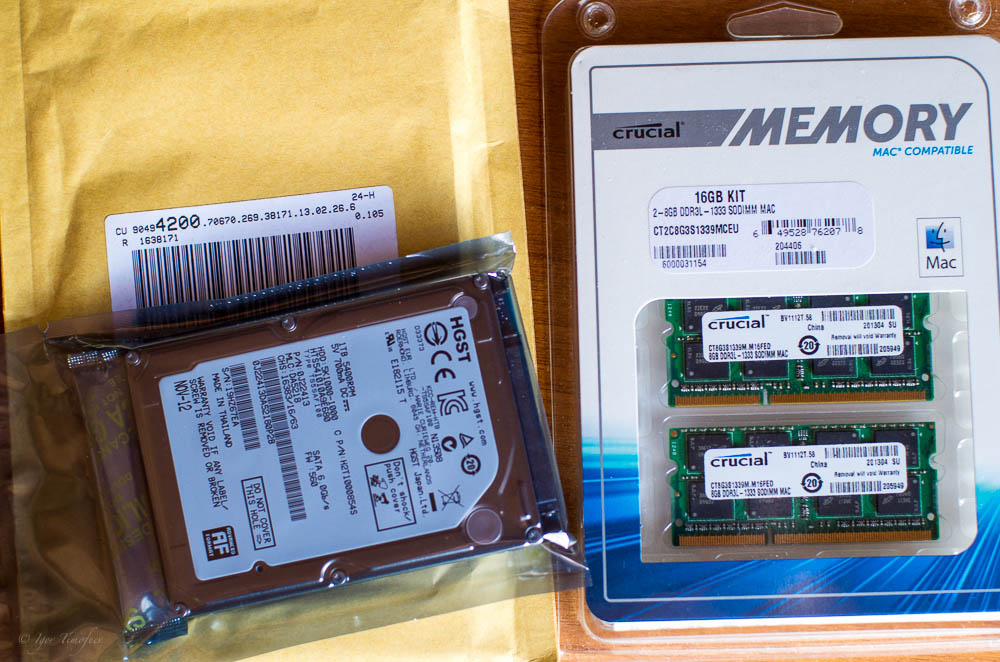
Yesterday I have got my upgrade kit from Germany, the 1TB HDD and 16GB RAM. Surprisingly, parcel arrived in two weeks, I was very pleased.
Luckily this RAM suited well my DELL, though it is for MACs. As I have read before, DELL laptop is a bit tasty about memory modules just as MacBooks do.
So I found out that Crucial modules works well for DELL.
Though I could not get kit specifically marked as “for DELL” from Crucial brand, but I managed to get Crucial’s “for Mac” one with the same specs (DDR3 1333MHz CL9) and it works!
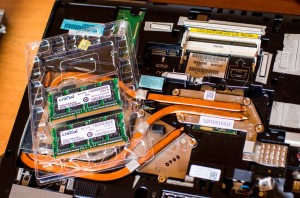
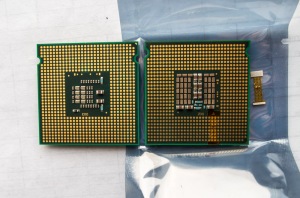
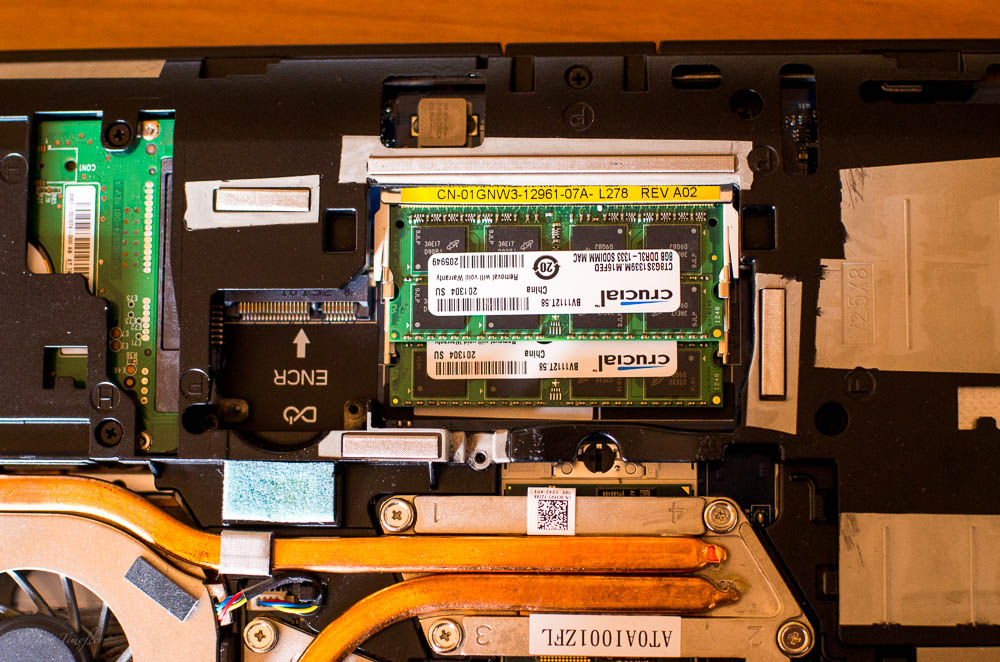
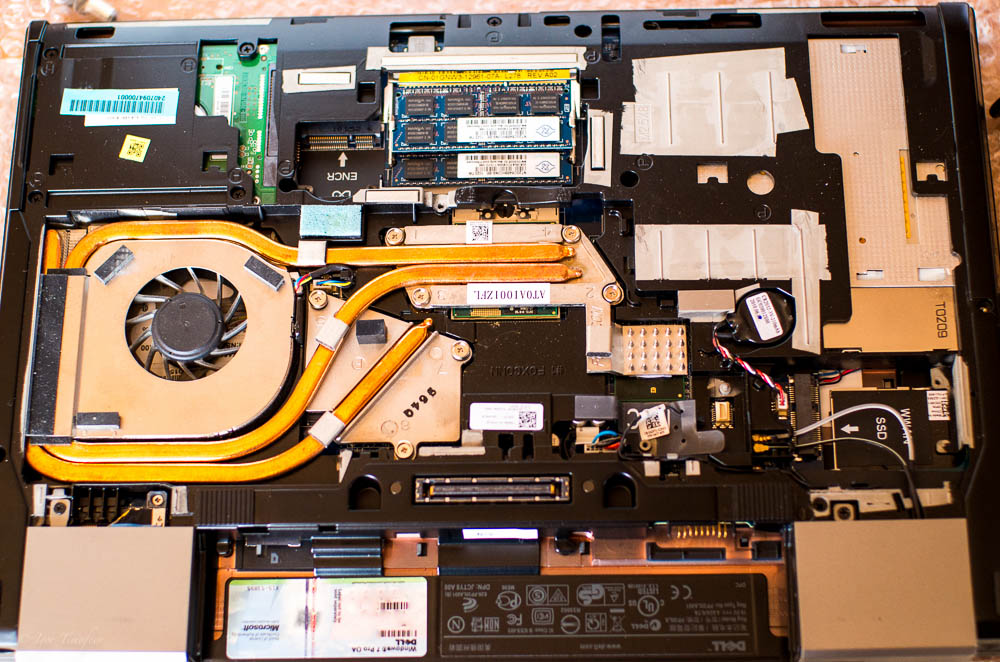
Install Crucial DIMMs in Dell M4500
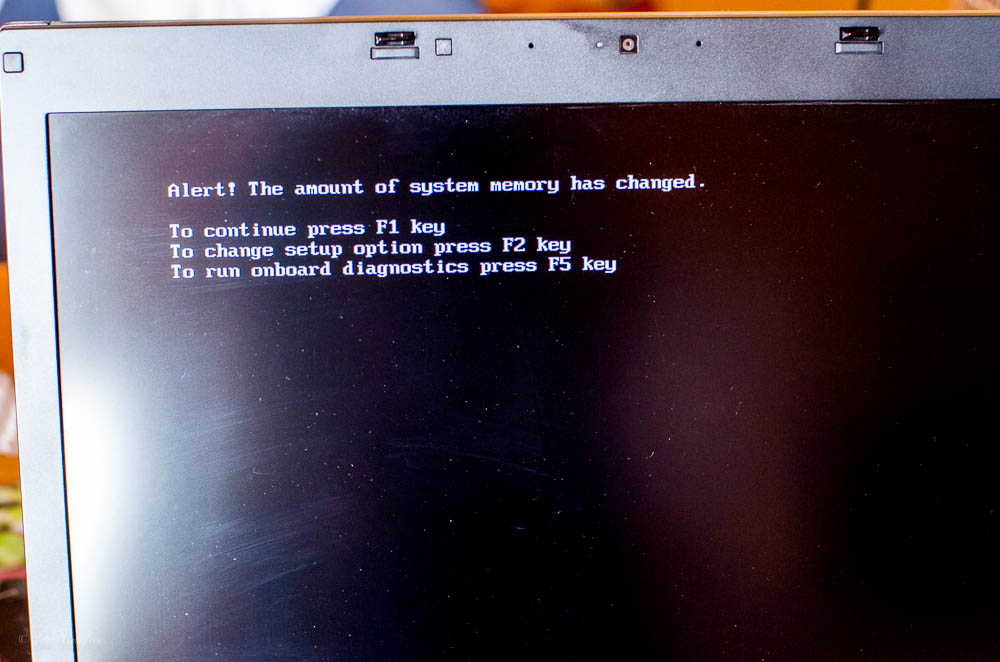
Please be carefull while installing memory in place. I have Slot-A DIMM not recognized at first, but after it was tight reinserted, both modules appeared in BIOS.

Install Crucial DIMMs in Dell M4500
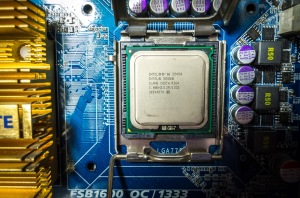
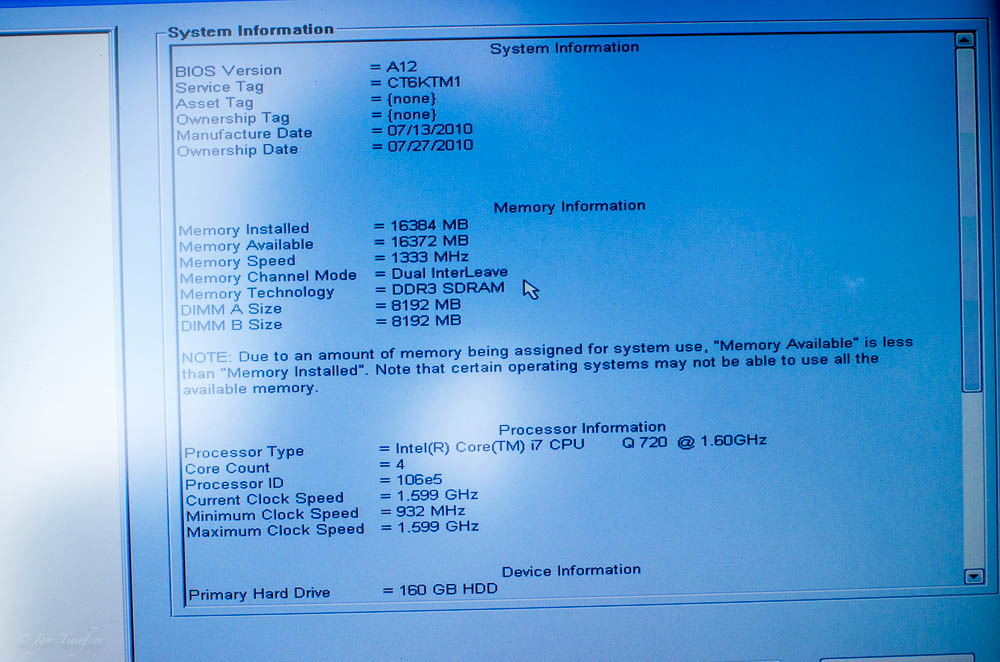
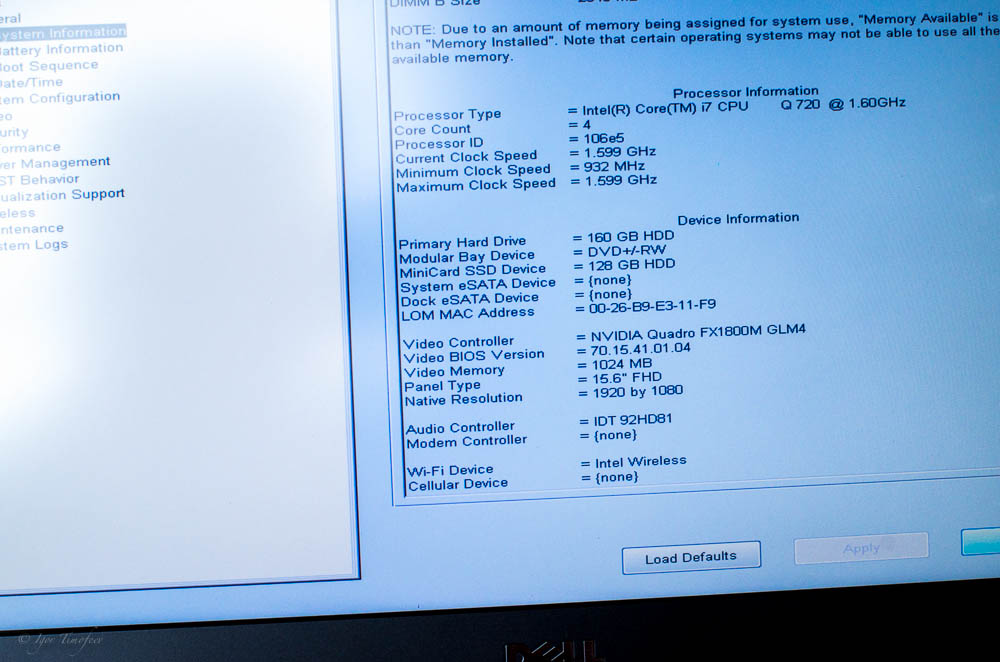
Ok, now power on, go to BIOS (press F2) and check for installed RAM.

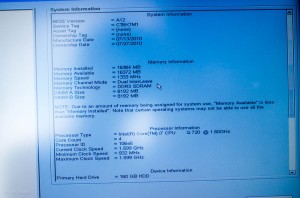
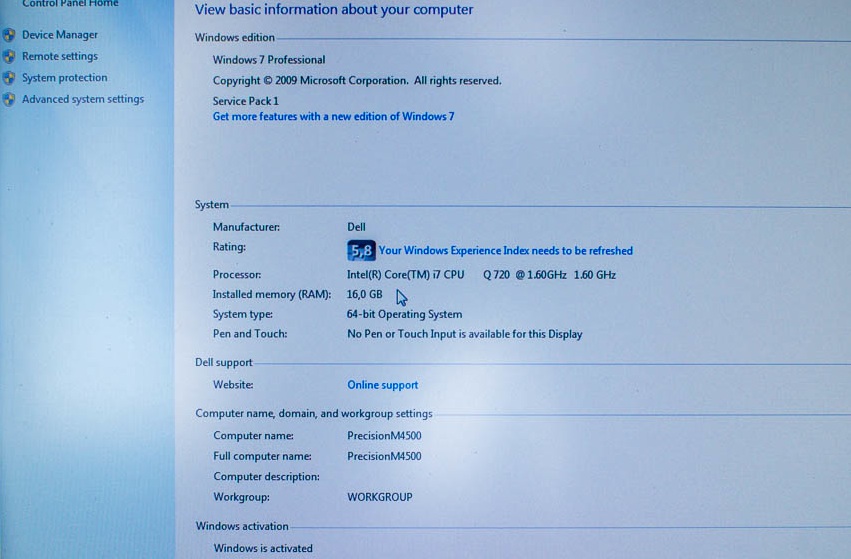
If everything’s fine, boot up Windows to check it out if Windows works well with your new RAM.


Seems Ok, 16GB of spare memory.
As for ratings, memory rating rised up a bit – from 7,3 to 7,4 with new dimms. Previously I had 1066 RAM installed, and now 1333 one.
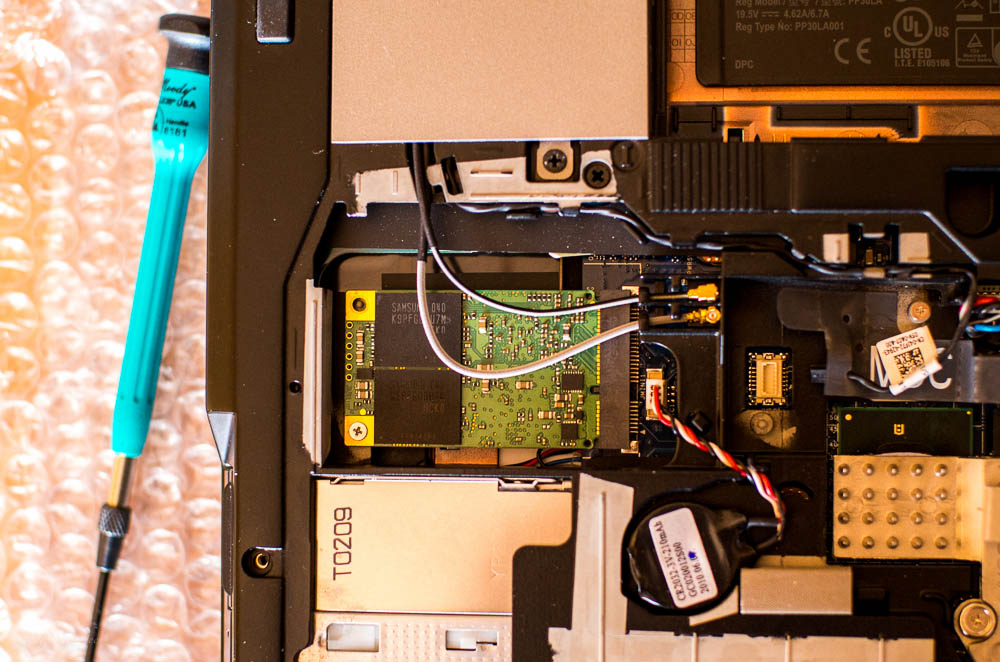
Next step should be installing Win7 onto mSATA SSD and replacing HDD with new one.
Actually I’ve already installed Win7, but I’m lazy (or have no time) to spent hours installing lots of Dell drivers, uhrrrr.
BTW, if you like me want to install Win7 onto mSATA drive, pull out your HDD drive! Or you will get Win7 spreaded over both drives – some here, some there. Just for note 🙂

Pull off HDD before installng Win on mSATA drive!
CU!